本项目基于Spring Boot框架,搭建了一个简单的登录微服务。
Spring Boot让我们的Spring应用变的更轻量化。比如:你可以仅仅依靠一个Java类来运行一个Spring应用。你也可以打包你的应用为jar并通过使用java -jar来运行你的Spring Web应用。
使用Spring Boot可以很方便的建立微服务。
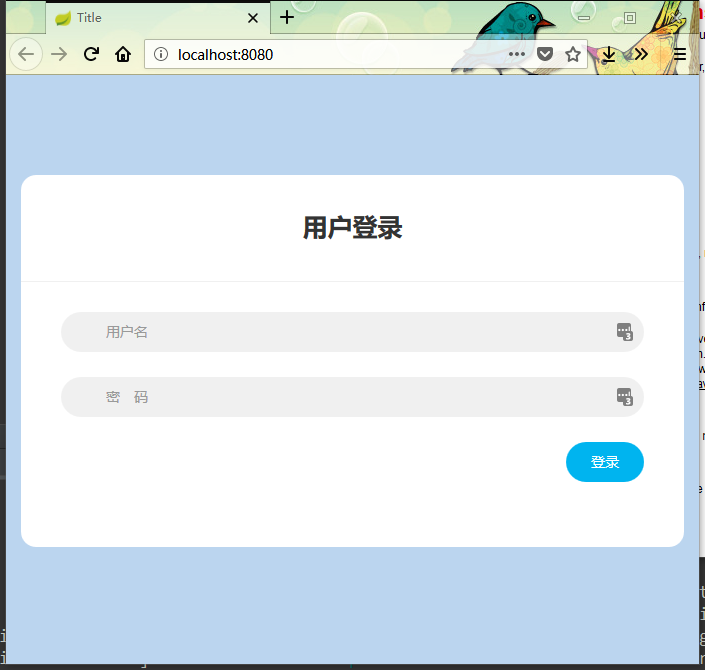
效果图 项目测试地址 :http://tianle.me:8080
项目代码:github
应用技术 Spring Boot + bootstrap + thymeleaf
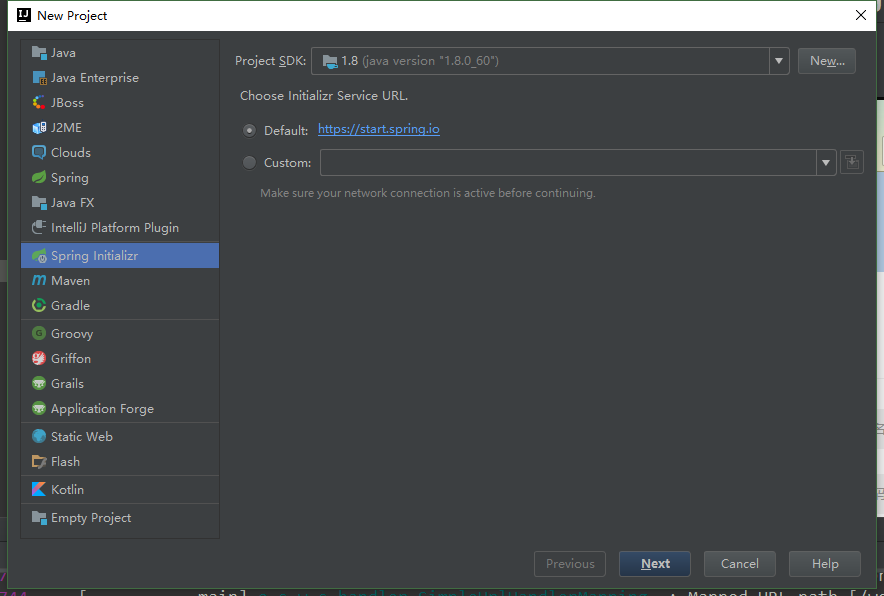
项目搭建 使用Intellij中的Spring Initializr来快速构建Spring Boot
菜单栏中选择File=>New=>Project…
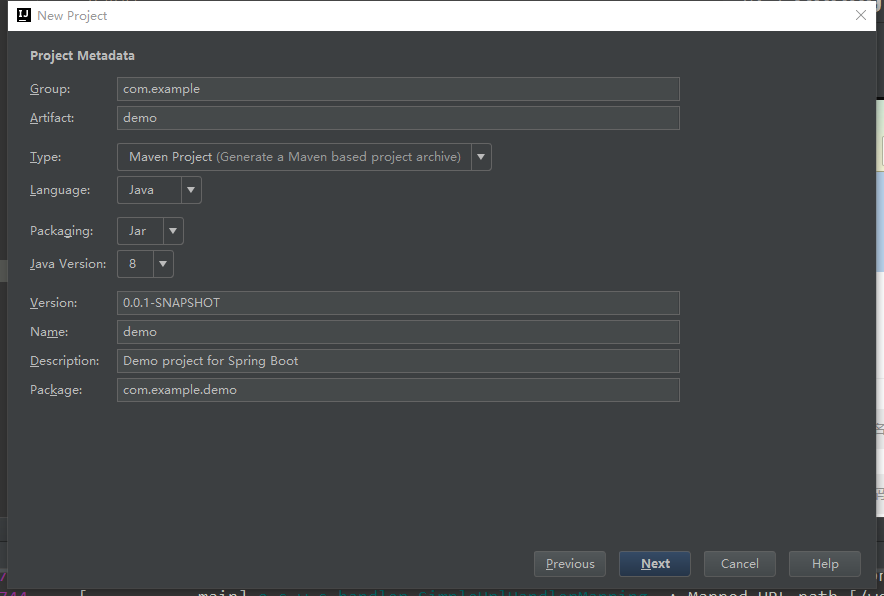
一直点下一步
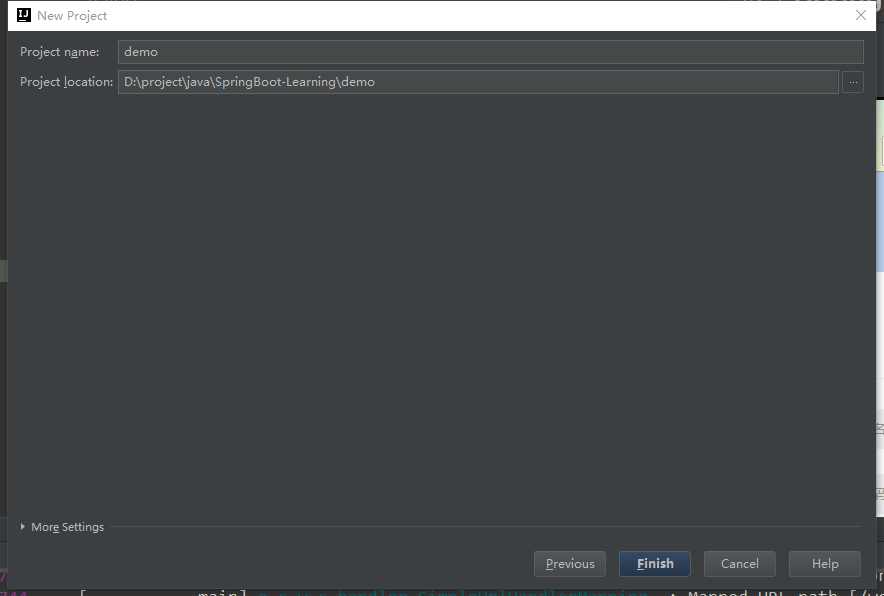
最后点击Finish
联网自动从网站上下载Spring Boot的模板,稍作等待框架就搭好啦。
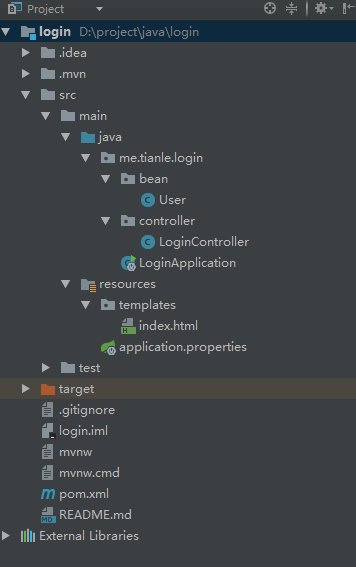
项目目录结构 上面步骤中的项目名字和这个截图有点不一样(login)
为了保证项目资源结构的清晰,我们把 src/main/java/ 再进一步进行划分:
src/main/resources/template/ 为静态页面的模板文件,这里用了thymeleaf模板渲染引擎框架(据说Spring Boot推荐)
maven配置 我们做的是Java web项目,在其默认生成的maven配置文件中添加web和thymeleaf依赖。
1 2 3 4 5 6 7 8 9 <dependency > <groupId > org.springframework.boot</groupId > <artifactId > spring-boot-starter-web</artifactId > </dependency > <dependency > <groupId > org.springframework.boot</groupId > <artifactId > spring-boot-starter-thymeleaf</artifactId > </dependency >
application.properties配置 这里我们配置 thymeleaf模板渲染引擎
1
2
3
4
5
6
7
8
9
10
11
12
13
14
15
16
17
18
# Enable template caching. spring.thymeleaf.cache=true # Check that the templates location exists. spring.thymeleaf.check-template-location=true # Content-Type value. spring.thymeleaf.servlet.content-type=text/html # Enable MVC Thymeleaf view resolution. spring.thymeleaf.enabled=true # Template encoding. spring.thymeleaf.encoding=UTF-8 # Comma-separated list of view names that should be excluded from resolution. spring.thymeleaf.excluded-view-names= # Template mode to be applied to templates. See also StandardTemplateModeHandlers. spring.thymeleaf.mode=HTML # Prefix that gets prepended to view names when building a URL. spring.thymeleaf.prefix=classpath:/templates/ # Suffix that gets appended to view names when building a URL. spring.thymeleaf.suffix=.html
其余的Spring Boot属性配置文件参考(本项目没有配置,使用的默认):Spring Boot属性配置文件详解
Bean 本项目为用户登录,只考虑用户这一个角色,包含用户名和密码。
1
2
3
4
5
6
7
8
9
10
11
12
13
14
15
16
17
18
19
20
21
22
23
24
25
26
27
package me.tianle.login.bean;public class User private String name; private String password; public User (String name, String password) this .name = name; this .password = password; } public String getName () return name; } public void setName (String name) this .name = name; } public String getPassword () return password; } public void setPassword (String password) this .password = password; } }
Controller web项目的控制器写在这里,处理页面的请求,前后台交互
@Controller:修饰class,用来创建处理http请求的对象
目前版本没有添加数据库,能否登录判断逻辑直接写死在代码中。
1
2
3
4
5
6
7
8
9
10
11
12
13
14
15
16
17
18
19
20
21
22
23
24
25
26
27
package me.tianle.login.controller;import me.tianle.login.bean.User;import org.springframework.ui.ModelMap;import org.springframework.web.bind.annotation.*;import org.springframework.web.servlet.ModelAndView;@RestController public class LoginController @RequestMapping ("/" ) public ModelAndView index () return new ModelAndView("index" ); } @RequestMapping (value = "/login" , method = RequestMethod.POST) public String login (@ModelAttribute User user) String name = user.getName(); String password = user.getPassword(); if (name.equals("qinya" ) && password.equals("tianle" )) { return "Success" ; } else { return "Failed" ; } } }
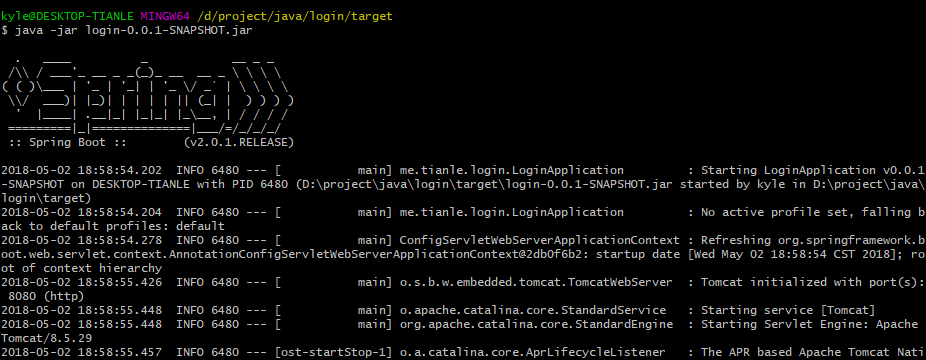
项目打包运行 使用maven进行打包。
Spring Boot里面嵌入了Tomcat,直接运行
http://localhost:8080
参考来源 Spring Boot基础教程 基于Bootstrap的简洁登录界面设计效果 Building an Application with Spring Boot